Do you want to know about how to clean refrigerator coils? If yes, then here we will share you some simplest steps that help to clean refrigerator coils and functioning optimally. After reading this article; you can easily clean fridge coils yourself at home without hiring any profession engineer.
What are Refrigerator Coils & Where is They Located?
Refrigerator coils are an integral part of a refrigerator’s cooling system, playing a crucial role in maintaining optimal temperatures and efficient operation. These coils, also known as condenser coils and evaporator coils are responsible for transferring heat between the refrigerant and the surrounding environment.
They are typically made of copper, aluminium, or a combination of both, and are located either on the back or underneath the refrigerator.
Condenser coils are typically located on the back or underneath the refrigerator. They are responsible for dissipating heat from the refrigerant, which has absorbed heat from inside the fridge. When the refrigerant flows through the condenser coils, it releases heat and condenses from a gas to a liquid state. The condenser coils then transfer this heat to the surrounding air or water, allowing the refrigerant to cool down and circulate back into the refrigerator to absorb more heat.
Evaporator coils, on the other hand, are situated inside the refrigerator. They work to absorb heat from the food and air inside the fridge. As the liquid refrigerant enters the evaporator coils, it evaporates into a gas by absorbing heat from the surrounding environment. This process cools down the interior of the refrigerator. The heated refrigerant gas is then carried outside the refrigerator to the condenser coils, where it is cooled and condensed back into a liquid.
Article Hot Headlines:
In this section, we will show you all headlines about this entire article; you can check them as your choice; below shown all:
What are Refrigerator Coils & Where is They Located?
Why Should You Clean Fridge Coils Regularly?
Necessary Tools to Clean Refrigerator Coils
How to Clean Refrigerator Coils? Easy Steps
How Often Should You Clean Refrigerator Coils?
What are the Symptoms of Dirty Fridge Coils?
Essential Tips for Keeping Your Refrigerator Running in Optimal Condition
FAQs (Frequently Asked Questions)
How to clean refrigerator coils without brush?
How to clean coils under refrigerator?
How to clean Evaporator coils fridge?
How to clean condenser coils fridge?
How does refrigerator coils work?
Can we clean refrigerator coils without moving the fridge?
Let’s Get Started!!
Why Should You Clean Fridge Coils Regularly?
Cleaning fridge coils regularly is important for several reasons:
Efficient Cooling: The coils in a refrigerator are responsible for transferring heat from inside the fridge to the surrounding environment. Over time, these coils can accumulate dust, dirt, and pet hair, which act as insulation and reduce the efficiency of heat transfer. Cleaning the coils helps to remove these obstructions, allowing the fridge to cool more efficiently and maintain optimal temperatures.
Energy Savings: When the coils are dirty and covered in debris, the refrigerator’s compressor has to work harder to achieve the desired cooling. This increased workload results in higher energy consumption and ultimately leads to higher electricity bills. By keeping the coils clean, you ensure that the fridge operates efficiently, reducing energy waste and saving money in the long run.
Prolonged Lifespan: Excessive dirt build-up on the coils can cause the compressor to overheat, potentially leading to mechanical failures or malfunctions. By regularly cleaning the coils, you help prevent the compressor from working under strain, thus extending the lifespan of your refrigerator.
Prevention of Refrigerant Leaks:In some refrigerators, the coils contain refrigerant, which circulates through the system to facilitate cooling. If the coils are dirty, sharp objects or abrasive materials may damage them, leading to refrigerant leaks. Not only can refrigerant leaks harm the environment, but they can also impair the cooling efficiency of the refrigerator. Cleaning the coils reduces the risk of accidental damage and refrigerant leaks.
Improved Air Quality: A dirty condenser coil can accumulate dust, mold, and other allergens over time. When these contaminants are present, they can be circulated back into the refrigerator and affect the quality of the stored food. Cleaning the coils helps maintain a cleaner environment inside the fridge, reducing the chances of contamination and odors.
Necessary Tools to Clean Refrigerator Coils
To clean refrigerator coils effectively, you will need a few tools. Here’s a list of the necessary tools:
Vacuum Cleaner with Brush Attachment: A vacuum cleaner will help remove loose dirt, dust, and debris from the coils. The brush attachment is useful for agitating and loosening the dirt for easier removal.
Soft Brush or Coil Cleaning Brush: A soft brush or a coil cleaning brush is handy for dislodging stubborn dirt or dust that the vacuum cleaner may not have picked up. Choose a brush with soft bristles to avoid damaging the delicate fins of the coils.
Microfiber Cloth or Sponge: A microfiber cloth or sponge is useful for wiping down the coils after vacuuming and brushing. Dampen it with warm water and mild detergent to remove any remaining dirt or residue.
Flashlight: In some refrigerators, the coils may be located in a hard-to-reach or poorly lit area. Having a flashlight can help you see the coils clearly and ensure thorough cleaning.
These tools should be sufficient for cleaning the refrigerator coils effectively. Remember to exercise caution and be gentle while working around the coils to prevent any damage.
How to Clean Refrigerator Coils?
Cleaning refrigerator coils is an important maintenance task that helps improve the efficiency and lifespan of your refrigerator. Over time, dust, dirt, and debris can accumulate on the coils, hindering their ability to release heat effectively.
Cleaning the coils regularly can ensure optimal performance. Here’s a step-by-step guide on how to clean refrigerator coils; this guide can be applicable to clean both condenser and evaporator fridge coils:
Preparation:
Unplug the refrigerator: Safety is crucial when working with electrical appliances, so start by unplugging the refrigerator from the power source. This prevents any accidents while you clean the coils.
Locate the Coils:
Depending on the type of refrigerator, the coils may be located at the back or beneath the unit. Consult your refrigerator’s manual to find the exact location of the coils. In most cases, you’ll need to remove a panel or grille to access the coils.
Gather the Necessary Tools:
You’ll need a few tools to clean the coils effectively. These may include a vacuum cleaner with a brush attachment, a soft brush or a coil cleaning brush, a microfiber cloth or sponge, and a flashlight (if the coils are hard to see).
Vacuum the Coils:
Use the brush attachment on your vacuum cleaner to gently remove loose dirt, dust, and debris from the coils. Move the brush back and forth, ensuring you cover the entire coil surface. Take care not to damage the delicate fins of the coils.
Brush the Coils:
Next, use a soft brush or a coil cleaning brush to dislodge any stubborn dirt or dust that the vacuum may have missed. Again, work carefully and avoid bending or damaging the coils.
Wipe Down the Coils:
Dampen a microfiber cloth or sponge with warm water and mild detergent. Gently wipe the coils to remove any remaining dirt or residue. Be cautious not to saturate the coils with excessive water.
Clean the Surrounding Area:
While you have access to the coils, take the opportunity to clean the area around them. Use the vacuum cleaner or a damp cloth to remove any dust or debris that may have accumulated near the coils.
Reassemble & Plug in the Refrigerator:
Once the coils and the surrounding area are clean and dry, carefully reattach any panels or grilles that were removed. Ensure they are secured properly. Finally, plug the refrigerator back into the power source.
It’s recommended to clean the refrigerator coils at least twice a year or more often if you have pets or if your home is particularly dusty. Regular maintenance will help keep your refrigerator running efficiently and extend its lifespan.
How Often Should You Clean Refrigerator Coils?
The frequency of cleaning the coils depends on various factors, including the environment in which the refrigerator is located. Here are some general guidelines:
Every 6-12 Months: It is recommended to clean the refrigerator coils at least once every 6 to 12 months. This time frame is suitable for most households with normal usage and relatively clean environments.
More frequently in dusty environments: If your home is particularly dusty or if you live in an area with high pollen or pet dander, you may need to clean the coils more often. Dust and debris can accumulate on the coils, hindering their ability to release heat effectively.
Signs of Excessive Dirt or Dust: If you notice visible dirt, dust, or debris on the refrigerator coils, it is a good indication that they need cleaning. Regularly inspect the coils, and if they appear dirty, it’s a good idea to clean them regardless of the time elapsed since the last cleaning.
What are the Symptoms of Dirty Fridge Coils?
Dirty fridge coils can lead to several symptoms that indicate their need for cleaning. Here are some common signs to look out for:
Overheating: One of the primary symptoms of dirty coils is an overheating refrigerator. If the condenser coils are covered in dust, pet hair, or other debris, they can’t release heat efficiently. As a result, the compressor has to work harder to cool the fridge, leading to increased heat production.
Inadequate Cooling: Dirty coils hinder the refrigerator’s ability to cool effectively. If you notice that the fridge isn’t maintaining the desired temperature or if certain areas are warmer than others, it could be due to restricted airflow caused by dirty coils.
Increased Energy Consumption: When the coils are clogged with dirt and debris, the refrigerator’s energy efficiency decreases. The compressor has to run for longer periods and work harder to achieve and maintain the desired temperature. As a result, you may notice a spike in your energy bills.
Excessive Noise: If you hear unusual or excessive noise coming from your refrigerator, it could be a sign of dirty coils. The strain on the compressor caused by restricted airflow can lead to vibrations, rattling sounds, or even loud buzzing noises.
Condensation or Water Leaks: Dirty coils can impact the refrigerator’s ability to remove moisture from the air. This can result in excessive condensation inside the fridge or water leaks. If you notice water pooling or dripping from the refrigerator, it’s worth checking the coils to see if they need cleaning.
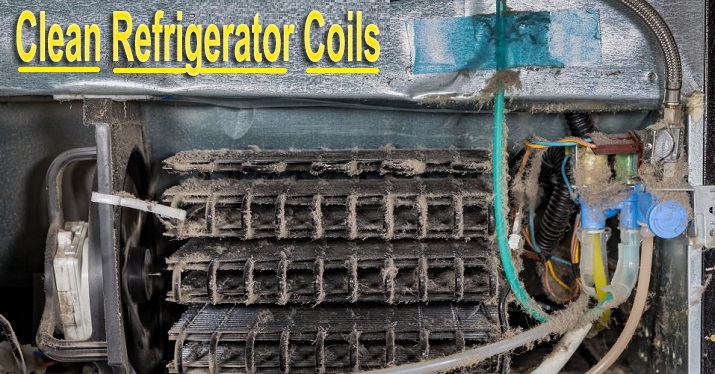
Accumulation of Dust and Debris: Visible accumulation of dust and debris on the condenser coils is a clear indication that they need cleaning. Check the back or bottom of the refrigerator for a build-up of dirt, pet hair, or other particles.
Essential Tips for Keeping Your Refrigerator Running in Optimal Condition
Keeping your refrigerator running in optimal condition is crucial for preserving the freshness of your food and maximizing energy efficiency. Here are some tips to help you maintain your refrigerator:
Temperature Control: Set your refrigerator temperature to around 37 to 40 degrees Fahrenheit (3 to 4 degrees Celsius) and the freezer temperature to 0 degrees Fahrenheit (-18 degrees Celsius). These temperatures will ensure food safety and prevent bacterial growth.
Clean the Coils: The condenser coils on the back or underneath the refrigerator can accumulate dust and debris, hindering heat dissipation. Regularly vacuum or dust off the coils to maintain proper airflow and cooling efficiency. Follow the manufacturer’s instructions for coil cleaning.
Door Seals: Check the door seals, also known as gaskets, regularly for any signs of wear or damage. Loose or damaged seals can allow warm air to enter the refrigerator, causing it to work harder and reducing energy efficiency. Clean the seals with mild soapy water and ensure they make a tight seal when the door is closed.
Keep it Stocked: A well-stocked refrigerator tends to maintain its temperature more efficiently than an empty one. Even if you don’t have a lot of food, you can fill empty space with bottles of water. This helps retain the cold temperature when you open the door, reducing the workload on the refrigerator.
Organization: Keep your refrigerator organized to optimize airflow and cooling. Avoid overcrowding and ensure there is space between items for cold air to circulate freely. This helps maintain consistent temperatures and prevents overworking the compressor.
Avoid Heat Sources: Keep your refrigerator away from direct sunlight, ovens, and other heat sources. Excessive heat can cause the refrigerator to work harder to maintain the desired temperature.
Clean Regularly: Regularly clean the interior of your refrigerator, including shelves, drawers, and door compartments. Use mild soapy water and a soft cloth to remove spills, stains, and food residue. Avoid using harsh chemicals that can damage the surfaces.
Proper Food Storage: Store food in airtight containers or wraps to prevent odors from spreading and to maintain freshness. Cover liquids to prevent moisture evaporation. Properly labeled food items can help you keep track of expiration dates and reduce waste.
Minimize Door Openings: Every time you open the refrigerator door, cold air escapes, and warm air enters. Minimize the duration and frequency of door openings to reduce energy consumption and maintain the desired temperature.
Regular Maintenance: Follow your refrigerator manufacturer’s guidelines for routine maintenance. This may include tasks like changing water filters, defrosting the freezer, or inspecting and replacing any worn-out components. Regular maintenance can extend the lifespan of your refrigerator.
FAQs (Frequently Asked Questions)
How to clean refrigerator coils without brush?
To clean refrigerator coils without a brush, unplug the refrigerator and use a vacuum cleaner with a narrow nozzle attachment to gently remove dust and debris. Alternatively, you can use compressed air in a can to blow away the dirt. Be careful not to damage any components.
How to clean coils under refrigerator?
To clean the coils under a refrigerator, unplug it and locate the coil compartment at the bottom. Use a vacuum cleaner with a narrow nozzle attachment to remove dust and debris. You can also use a long-handled brush or compressed air to clean hard-to-reach areas.
How to clean Evaporator coils fridge?
Cleaning the evaporator coils in a fridge requires a bit more effort. Start by unplugging the fridge and locating the evaporator coil, typically found inside the freezer compartment behind a panel.
Remove the panel and use a soft brush or a fin comb to gently remove any dust or debris from the coils. Be careful not to bend the delicate fins. If there’s excessive dirt or grime, you can use a mixture of warm water and mild detergent to lightly scrub the coils.
Rinse with clean water and let the coils dry completely before reassembling the panel and plugging in the fridge.
How to clean condenser coils fridge?
To clean the condenser coils of a fridge, unplug it and locate the coils either at the back or underneath. Use a vacuum cleaner with a brush attachment to remove dust and dirt. You can also use a coil cleaning brush or compressed air to remove stubborn debris.
How does refrigerator coils work?
Refrigerator coils are made to dissipate heat. When the coils get dirty, the dust and grime works to insulate the coils so that they hold onto heat, which means that your refrigerator has to work harder to keep the temperature cool.
Can we clean refrigerator coils without moving the fridge?
It is possible to clean refrigerator coils without moving the fridge, but it may not be as effective. You can use a flashlight to help you see the coils if they’re located beneath the fridge, and vacuum loose dust and debris along the inside of the toe space.
However, moving the fridge allows you to access the coils more easily and thoroughly clean them.
Final Thoughts
Cleaning refrigerator coils is a simple yet crucial task to maintain the optimal performance of your appliance. By following the steps mentioned in the guide about how to clean refrigerator coils; you can ensure that your refrigerator operates efficiently and lasts longer.
Regularly cleaning the coils helps prevent dust and debris build-up, which can hinder the cooling process and increase energy consumption. If this content is valuable for you, then please share it along with your friends, family members or relatives over social media platforms like as Facebook, Instagram, Linked In, Twitter, and more.
If you have any experience, tips, tricks, or query regarding this issue? You can drop a comment!