In this article, we will guide you about how to zip file on Mac and Macbook. At the end, you will say that it is easier task and i can compress files on my Mac.
What is ZIP File?
You can say “ZIP file or Compress file” both are same meaning. A ZIP file is bunch of files or folders that have been compressed into onefile, you can also say that it is compresses version of enlarge file or folder. Zip file is as same original file but put <.zip> extension is added at the end of file name. Uses can easily to send this compressed file instead of large file via cloud storage and email.
While zipping files and folders, you can save your storage space in your Mac and it is used for other purpose as well. Compressed files are more protected compare to other files which put in a folder. Because without getting to unzip this files, you can’t access them.
How to Zip Files on Mac
Here, we will explain about how do you create or make a zip file on your Mac and after getting to compress a file, can be sent to easily without acquiring a lot of memory space.
Now let’s start!!
How to Create a Zip File on Mac: Single File
Mac has built-in tool “Archive Utility” that lets you to create a zip file or folder by following few simple steps; below mentioned all:
Firstly you have to need launch Finder App and check makes ensure that is running actively.
Next put all files in the same folder, you wish to zip: Drag and Drop all files and folders into same location.
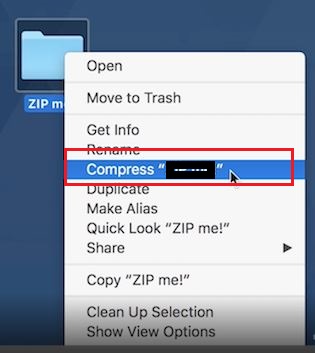
Now make right click on your folder that containing all your files and folders.
Then this will open drop down contextual menu and then click on <Compress {File Name}>
Then this will open automatically compression feature to compress your files and folders. By default, your zip files will containing same name as your folder name, but attaching <.zip> extension at the end of this file name.
Now you can search your zip file in same folder as your original folder.
How to Make Zip File Using Terminal
Here, you can make a ZIP file or folder without getting to set password protected. To do this:
Firstly you have to launch Terminal App on your Mac or Macbook
Next execute <cd> command to find to folder where files you wish to collect your ZIP are located.
When you are presented in this folder then you have to use few commands to make a ZIP.
{zip sample.zip myfile.txt}
myfile.txt is a file that to be attached for getting to ZIP, and sample.zip is the name of output ZIP.
Now Terminal lets you will make and place the ZIP archive in your current folder location.
How to Compress Files on Mac Using B1 Free Archiver App
B1 Free Archiver is free version app that allows you compress a file or folder as its own B1 archive format.
Firstly you have to download and install B1 Free Archive
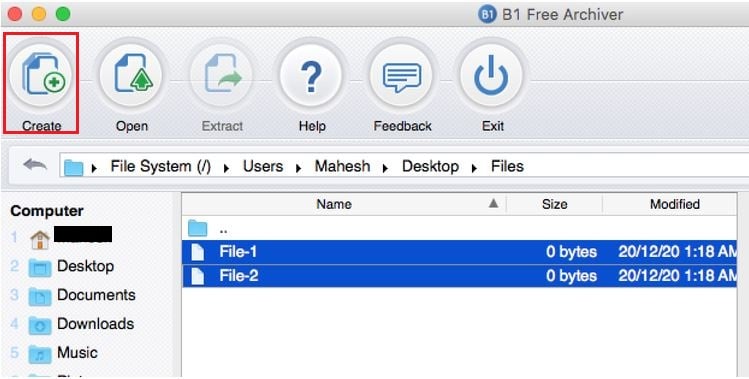
Once done it, open B1 Free Archiver on your Mac
Choose files or folder that you wish to add in your archive by using built-in file manager.
Press on <Create> button that is appearing at the top of same window.
Next, hit on <Browse> to choose folder to keep your archive, and select the format from <Archive format> and click on <Start>.
How to Make Zip Multiple Files and Folder on Mac
To ZIP multiple files or folders works same as ZIP one file. Just name of ZIP file is different. Here’s how!
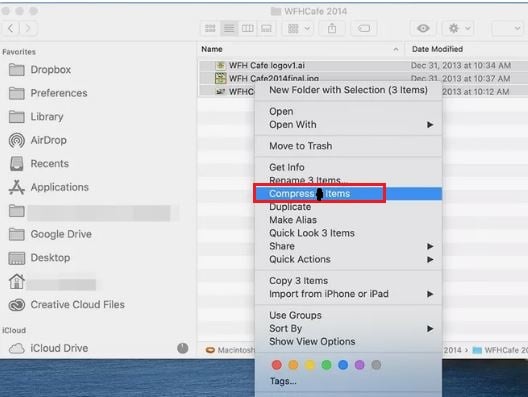
Open Finder and find out your folder that containing all files or folders, you want to zip.
Choose all files or folders, you wish to include in ZIP file, and <Shift + Click> to select the multiple files.
Now make right click on any file and then choose <Compress {No of items}> like as Compress 10 Items.
Further you can search Zip items in a file known as <zip> that is same folder as original.
Fix: Compression Not Working?
Unfortunately, if you are not able to compress files or folders because their file permission are not granting you, so here you have to change file permission with using few simple steps; below mentioned all:
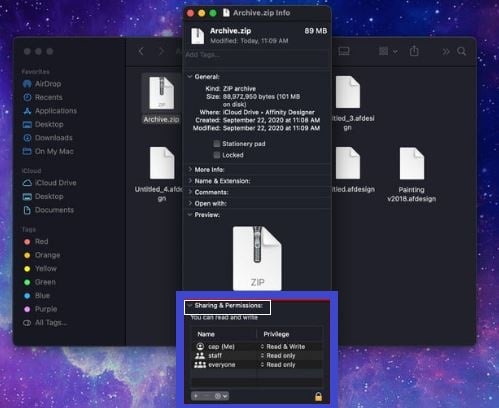
Make right click on your file or folder you wish, then appear drop down menu and select <Get Info> from context menu.
Now hit on arrow that is appearing next to <Sharing & Permissions> to view this option.
Further you have to check that your particular account is set as administrator and granting your permission is <Read & Write or Read Only>
If you are not log in as administrator, then hit on <Lock> button and again log in as administrator credentials. Then have to change permission to Read & Write or Read Only.
Now you can try to compress files on your Mac. I hope your problem would be sorted out.